How to Install ProtonVPN on Your Router Step by Step
How to install ProtonVPN on your router is a question many people are now asking as the need for online privacy intensifies. Using a VPN directly on your router provides comprehensive protection for all devices in your home network, including those that might not support VPN apps, such as smart TVs, gaming consoles, and IoT devices. If you value security and want seamless VPN coverage for your entire household, setting up ProtonVPN at the router level is an effective solution. This step-by-step guide will help you navigate the process, highlighting essential tips and best practices for a smooth installation.
—
Why Install ProtonVPN on Your Router?
Before jumping into the installation process, it’s crucial to understand the benefits:
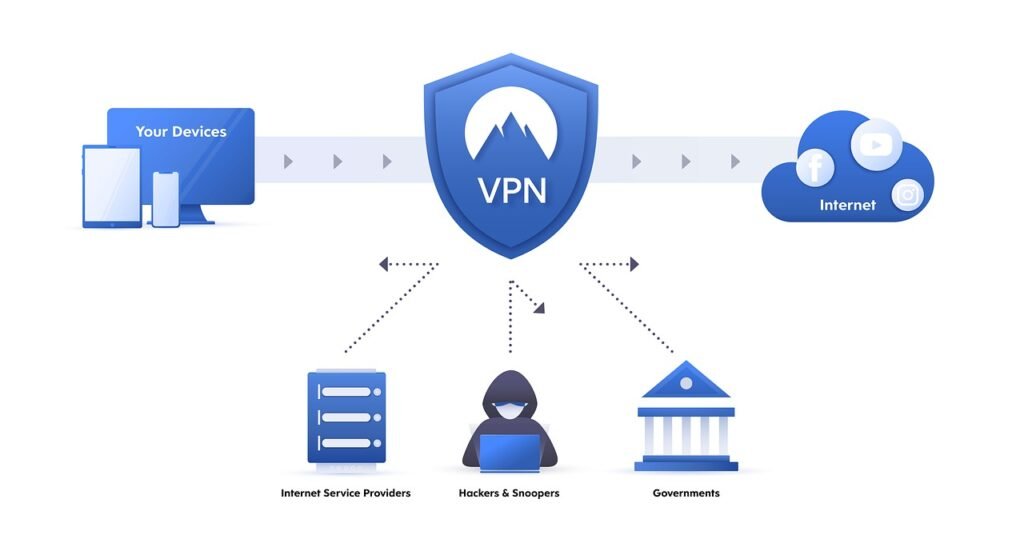
– Device-wide Protection: Every device connected to your Wi-Fi, from your phone to your smart fridge, is protected by the VPN tunnel.
– Bypass Device Limitations: Most VPN services limit the number of simultaneous connections. Installing ProtonVPN on your router bypasses this restriction.
– Always-on Security: You won’t have to remember to activate your VPN. Once set up, it remains active for all network traffic.
– Unlock Geographically Restricted Content: Access streaming, news, and other content unavailable in your country on any device.
While the advantages are clear, it’s important to note that some routers do not natively support VPN software. Let’s dive into what you’ll need to get started.
—
Preparation: What You Need
Not all routers are built equal when it comes to VPN compatibility. Here’s a checklist before you proceed:
1. A Compatible Router
Routers that support OpenVPN or have custom firmware like DD-WRT, Tomato, or AsusWRT are typically required. Popular off-the-shelf brands include Asus, Netgear, and Linksys (with supported models).
2. ProtonVPN Account
You’ll need a ProtonVPN Plus or Visionary plan, as router support is not available for free or Basic plans.
3. Access to Your Router’s Admin Interface
Know your router’s local IP address (commonly 192.168.1.1 or 192.168.0.1) and your admin login credentials.
4. Firmware Knowledge
If your router doesn’t support VPNs out of the box, consider flashing it with DD-WRT, Tomato, or OpenWRT. This is an advanced step and should be approached with caution.
—
Step 1: Obtain ProtonVPN OpenVPN Configuration Files
To set up ProtonVPN, you’ll need special configuration files:
Log in to your ProtonVPN dashboard.
Navigate to Downloads and select OpenVPN configuration files.
Choose your preferred server location and download the required `.ovpn` files.
These files contain the settings your router needs to establish a secure connection to ProtonVPN servers.
—
Step 2: Access Your Router’s Admin Panel
Open your browser and enter your router’s IP address in the address bar.
Log in with your admin credentials.
Look for the VPN or Advanced Setup section — terminology may vary by manufacturer and firmware.
If you have a router running DD-WRT or Tomato, VPN settings are usually under Services > VPN.
—
Step 3: Upload ProtonVPN Configuration to Your Router
This is where you integrate ProtonVPN into your network:
For DD-WRT/Tomato Routers
Under Services > VPN:
1. Enable the OpenVPN Client option.
2. Fill in the settings as required:
– Server IP/Name: Copy from the ProtonVPN OVPN file (`remote` line).
– Port: Typically 1194 or 443, as indicated in the `.ovpn`.
– Tunnel Device: Set to TUN.
– Tunnel Protocol: Usually UDP.
– Encryption Cipher & Hash Algorithm: Refer to the `.ovpn` file or ProtonVPN’s setup guides.
3. Copy and paste the contents of the `.ovpn` file into the relevant configuration boxes (CA Cert, TLS Auth Key, etc.).
4. Enter your ProtonVPN credentials when prompted (these may differ from your standard login; use the ones provided for OpenVPN).
For AsusWRT Routers
Under VPN > VPN Client:
1. Add a new profile.
2. Choose OpenVPN.
3. Import the downloaded ProtonVPN `.ovpn` file.
4. Fill in your OpenVPN username and password.
5. Apply the settings and enable the connection.
If your router interface is different, refer to the ProtonVPN support site or manufacturer’s documentation for more specific instructions.
—
Step 4: Test Your VPN Connection
Now that ProtonVPN is installed, you’ll want to verify connectivity.
Go to whatismyipaddress.com from any device connected to your Wi-Fi.
Your IP should show as that of the selected ProtonVPN server location.
* Visit protonvpn.com/secure-core to confirm Secure Core if you enabled it.
If you see your usual IP, double-check the configuration and restart your router.
—
Troubleshooting Installation Issues
Common Problems:
– VPN Not Connecting: Double-check your credentials and ensure the correct OVPN file is uploaded.
– Slow Speeds: Change to a less congested ProtonVPN server or adjust your router’s encryption settings.
– Router Not Supporting VPN: Consider updating the firmware to DD-WRT, Tomato, or purchasing a pre-configured VPN router.
ProtonVPN’s official support and various user forums are excellent resources if you run into any snags.
—
Security Tips for Router-Based VPN Setups
Installing ProtonVPN on your router maximizes privacy, but you can further bolster security:
– Keep Firmware Updated: Outdated firmware exposes vulnerabilities exploitable by attackers.
– Change Default Passwords: Set strong, unique administrator passwords.
– Disable WPS: This feature is convenient but often insecure.
– Periodic Reboots: Reboot your router to refresh connections and apply updates.
—
The Bottom Line
Running ProtonVPN on your router is a robust way to secure all your internet-connected devices, providing peace of mind for you and your household. The setup process may seem daunting, but by following the steps above and referencing your router’s manual when needed, you can achieve network-wide anonymity and thwart online threats. As digital threats grow, empowering your home network with a reputable VPN like ProtonVPN is a seriously smart move.